Friday, November 2, 2012

Pumpkin Cobbler- Perfect for fall!

Whoa! It has been a while since I've been able to post. Life happens so quickly sometimes! It zooms and it zims and then all of a sudden you find yourself so far from where you used to be. Literally.

Over the past few months we decided to delve into a new career. A new ministry career. It brought with it an enormous move- over 1,000 miles from where we were and on the opposite coast from where I was born and raised.

I'm not complaining, per say. I mean, with this move also comes endless sunshine and warm weather. Not the bitter-cold of the North, which we had called home for 2 years.

This move also brought about more work. Different work. Emotionally draining work at times. And baking. We have a group of volunteers that I've spend every week baking for....it's been a way of healing for me, and hopefully the cause of great joy for them.

Something about mixing, beating, the loud whir of my kitchen-aid put my heart and mind at ease. Never mind the fact that it took 2 months to figure out my way to the grocery store and back. Sometimes, a quick trip for eggs has taken me on a journey that lasts an hour as I attempt to navigate the new and unknown waters of this city.

But the baking.... the baking is a breath of fresh air. It fills my new house (which doesn't quite have that "cozy" feel of home just yet,) with the aroma of sweet, sweet smells. It makes everything seems OK when nothing is friendly or familiar anymore. When you miss those midday meetings with girl friends and the neighbor who took the time to visit when you were down. Being in the kitchen stays familiar. The warmth radiating from my oven, the cracked eggs on the counter..... makes this my home, and soothes my lonely soul. Truly, this is "baking up joy".

What makes it even better (for my waistline!) is that it all  most goes out the door, and the joy continues!

Today a recipe from long ago. I'm trying to mimic my favorite season of fall- which doesn't exist in these parts- by making all things pumpkin. No gorgeous trees of burn orange, red and yellow span my lawn, but inside, in my kitchen, fall is here! (Well, that paired with all my artificial leaves out for decor)
I stumbled upon this recipe  via a friend, who must have given out 20 copies the day she brought it for us to enjoy. I'm telling you now, you WILL want to eat it all, yet you will also want to take it to your next fall get together. And be prepared with the recipe, because you WILL be sharing it. It's that good!

Pumpkin Cake Cobbler
Cobbler:
4 eggs, slightly beaten
1 lrg can of pumpkin (29oz) or 3 Cups fresh
1 1/2 C sugar ( I lessen this amount to 1 C)
1 tsp. EACH salt, cinnamon, ginger
1/2 tsp cloves
1 lrg can evaporated milk
Topping:
1 box white or yellow cake mix
1 1/2 C chopped pecans
1 C melted butter
I bake my own pumpkins every year. It's not hard! Just slice in half, gut them, place face down in an inch of water, and bake at 400 for about 1/2 hour. When they are cooked, scoop them out into a blender, add about 1/4 C water and blend until smooth.

Combine all ingredients in the order given above for cobbler. Mix until well blended.
Pour into a greased 9X13 pan.

If using fresh pumpkin, your batter will be runny! And don't mind the broken spatula... anybody want to get me new ones for Christmas? Feel free :)

Once you've poured the cobber into the pan, it's time for the topping. EASY!
Sprinkle the dry cake over the cobbler. Add the nuts to that. Last, pour over the melted butter (I use unsalted.) Pop it in the oven preheated to 350F. Bake for 1 hour and check. If a knife comes out clean it's done. If not, keep baking. (It can take from 1 hr to 1 1/2 hrs.)
 
Serve cooled or cold with whipped cream. En-joy!


Wednesday, May 23, 2012

Fresh and Healthy Thai Pizza


Good afternoon! I've been MIA lately as some mini family crisis's have kept me away from my usual computer time, but I'm back! And make no mistake, I have still been collecting and cooking while I was away!

Today's recipe was given to me via a great friend, who gives me loads of great recipes. I'll be featuring more of her delightful dishes in the future. Since it is now summer break in many parts of the country, I thought I'd feature this delish pizza that loaded with fresh veggies and chicken, and only a little bit of cheese.

Now, as I've mentioned in the past, I'm not keen on making my own dough. I seriously mess it up every time. I think it's because I'm pretty impatient. well, that and I'm not one to follow recipes exactly- so when it says "put yeast in water between such and such temperature", I tend to throw it in too hot (or cold) and yeast does not work that way my friends! Thank goodness for frozen dough balls in the store!

Pinterest has sparked my curiosity on the cauliflower crust though. I'm pretty sure it's yeast free and I'm super excited to try it sometime in the future. Plus it's more healthy. I'll bet it's still delicious when piled high with these topping too!!

Although I'm not a huge fan of making my own crust from scratch, I am a huge fan of Thai food. I love coconut everything, and Thai food uses plenty of it. I like their mix of sour and salty and their use of cool veggies that I have to trompse (is that even a word?!) through town hunting down ll kinds of cool oriental shops to find ingredients. I feel like I'm a kid on a treasure hunt and I love it!

I do however recognize that not everyone is up for this kind of food fun treasure hunt, so you'll be delighted to know that all the ingredients can be found at your friendly neighborhood market.The original recipe is from Rachel Ray, but I have altered it a bit to make it easier and tastier.

So, get cooking, and invite a few friends over for dinner! They'll love this gem of a pizza!

 Thai Pizza


  • 1 pizza dough, any brand- thawed if frozen
  • 1/2 jar duck sauce or plum sauce(I've even used hoisin!)
  • 1/2 teaspoon crushed red pepper flakes
  • 1 package (2 cups) shredded provolone or Monterey Jack cheese
  • 1 red bell pepper, thinly sliced
  • 1 tablespoon vegetable oil
  • 2 tablespoons soy sauce
  • 1 rounded tablespoonful peanut butter
  • 2 teaspoons hot sauce
  • 2 teaspoons grill seasoning
  • 4 chicken breast cutlets, or already cooked chicken (like rotisserie- or leftovers!)
  • 2 tablespoons honey
  • 2 tablespoons cider vinegar
  • 1/2 C shredded carrots
  • 4 scallions, chopped
  • 2 cups fresh bean spouts
  • Palm full cilantro leaves, chopped
  • 1/4 cup chopped peanuts, 2 ounces


Preheat oven to 430-440 degrees F.

Form pizza crust on pizza pan or cookie sheet.(I roll mine out on a baking stone. I don't need to use extra flour or oil!) 


Top with duck or plum sauce(here I used 1/2 jar of hoisin as that's all I had. It's a bit spicier and a little heavier than duck or plum) - spread it around like you would pizza sauce. 


Sprinkle the pizza with some crushed red pepper flakes then top with cheese and peppers.


Preheat a nonstick pan over medium-high heat. Combine vegetable oil, soy sauce and peanut butter with hot sauce and grill seasoning. Use the microwave to loosen up peanut butter if it is too cold to blend into sauce, 10 seconds. Add chicken and coat evenly with mixture. Let stand 10 minutes then cook chicken cutlets 2 to 3 minutes on each side, until firm. Slice into small chunks.
**(If using rotisserie or leftover chicken, as I did, skip the cooking part and just chop chicken into chunks and coat with peanut butter mixture.)

Add the chicken to your uncooked pizza and bake for 15-18 minutes. check it after 11. Pop any bubbles in the dough.


While pizza cooks, mix honey and vinegar and add the carrots. Turn to coat evenly. 

 (fresh out of the oven- so delicious looking isn't it?!)
When Pizza is a nice brown and bubbley color pull it out. Let stand just a couple of minutes, the pile on all your fresh goodies. I start with the bean sprouts, then I add the green onion, the carrots (drain them of the liquid they've soaked in), and finally the cilantro and peanuts.

 (It's a feast for the eyes and for the tum!)


Now, get ready to become addicted! I'm sure this will become a regular on your menu just like it is on mine!


Tuesday, May 1, 2012

Hunger Games cake


Do-DO-do-Do.

That my friends, is the sound of the hugely popular Hunger Games theme song. Or at least that's how I type what I hear in my head.

Knowing how popular the books and movie are, I decided to take today to show you this cake, and describe how I made it. Just in case you have a fan out there who wants one for their special day.

First, I do this as a business. So I do have skill (sometimes!) and tools. But many people could pull this off. Beware! It's gonna take some time if you plan to make it. I would set aside about 6 hours from start to finish. Yes, 6 hrs. I know on all the cake movies they just make stuff happen, but that's after editing out hours and hours of artistic prep work. Ever look at a cake and wonder how they did it? TIME! They took lots of time :) That's why they both A)Look so good and B) cost so much money!

So, now let me begin by saying I didn't take one photo of the process. I wasn't planning to post it- but I loved the way it turned out- so I have to share.

You'll need:
A 2 layer cake, filled, iced, and covered with black fondant or icing.
Gumpaste
2 sizes of circular objects to fit your cake (to trace)
A print out of the Hunger Games pin sized to fit the top of your cake
A small sharp, sharp knife or exact-o knife
Chopstick or something to detail your gumpaste Mockingjay
Gold luster dust
Grain Alcohol
Paint brushes
Red, orange, yellow food coloring
A spaghetti noodle

I begin with a nice 2 layer cake. I overfill my cake pans (using a box mix? Use 2 to fill 2 8" pans- one mix isn't enough. You'll have leftovers, but make cupcakes! Or cake balls!)

When cakes are cold, fill and ice them. Make sure you ice them cold. Like fridge cold- it'll help with the crumbs.

At this point, I roll out and cover my cakes in fondant. You always have the option of just icing them well. Make it as smooth as you can either way!

For the logo on top, you'll need gumpaste. I make mine, but you can buy Wilton brand at most Walmart's. Micheal's, Hobby Lobby. Use as directed! 

Roll out and cut a circle shape- as big as your cake. For mine, I used the cake pan that I baked it in. I use a sharp exact-o to cut. Then find a smaller circle and cut the middle out. Carefully place it on your cake.

Find a hunger games logo on Google. Size it to your cake. Print. This will be your "bird pin" template- so cut out the bird. Roll out some more gumpaste to fit you bird, lay your paper template on top and carefully cut it out. Quickly make all the feathers and details before it dries. Use a chopstick or anything like it if you don't own gumpaste tools to "draw" the details on.

Use the same template to cut the pieces for the arrow. Use a piece of angel hair pasta as your arrow, ad use icing to "glue" the arrow together.  

Now, pain the whole thing gold. I carefully painted the outer circle while it was already on my cake. But the bird/arrow needs to be done before adding it. I use a mixture of petal dust and grain alcohol to paint. After it's done and paint is dry, carefully place it on the cake.

I used a shimmery rouge color to add some dimension to the "pin" in spots.

Now for the flames. You'll roll and cut these also out of gumpaste. I did a few "flames" at a time, then added them to my cake. After all the flames are cut and applied to the sides, paint them! I used liquid food coloring. You could use wilton gel colors and just make them thinner with grain alcohol, or you could buy that simple 4 pack of food coloring sold in the baking isle.

Using a small and med. brush, paint red on all the flames edges. After they're all done, go back and paint orange on the inside of the red, followed by yellow. Blend the edges a bit and voil'a! They really look like they're on fire!

I used a food coloring pen to write on the outer ring of the pin, but proceed with however you'd like to finish it. 


Wednesday, April 25, 2012

Yummy Chicken Salsa Salad


I've been working hard at staying healthy lately. I'm not going to lie, it's been mostly for vanity reasons. Our recent spring break trip to the sunny state of Florida, was a huge motivator.  My goal was simple: feel better than last year.

I have a confession.I'm not a big breakfast person. I drink green tea or coffee every morning, and consider that my meal. Not very healthy I know. It usually means that by lunch time, my blood sugar has dropped and my hyperglycemia self starts to get crazy and then I grab the nearest carb loaded quick junk food I can find to show down on.

Not the best thing to do when you're working on looking good for a trip!

Enter: The chicken salad. It's quick, it's super easy, and it's loaded with great things for your body.  I could seriously eat this every meal and be satisfied. (Which is saying something since I get bored with food easily!)

I got this recipe from a friend who made it for me for lunch one day. After tasting it, I knew I had to have it, and I've done well to pass it on the same way when I invite girlfriends over for lunch dates.I'm forever indebted to my friend for passing on such an amazing meal :)

I usually serve it over a bed of lettuce, but to make it more fun for the kids, this time I put it on lettuce leaves, for them to roll and eat themselves. I won't lie: it was a messy meal. But they had fun, and they clean up pretty well with water.

Chicken Salsa Salad

2/3 C Salsa (any brand- but if you use a "fresh" variety make sure to drain some of the liquid!)
1/2 C fat free Mayo (I actually use something called Veginase that I get from the health food store, it's like Mayo but made out of grape seed oil!)

1 C. halved grapes (I use red)

1 C celery, chopped
1 lb chicken, shredded. I usually use a rotisserie
Salt/pepper


Slivered almonds for topping
Salad or lettuce leaves


Combine all ingredients except the salad and almonds. Mix well and refrigerate for 30 minutes.

Serve over lettuce and sprinkle with almond slices.


Enjoy!
Friday, April 20, 2012

Gauva Coconut cupcakes


Oh yum. That's about all I have to say about this easy and delish recipe I have for you today.

I know the cupcake scene came in fast and furious. I've heard it speculated for the last couple of years that cupcakes shops are on their way out. But, as a baker, I can tell you that I still have loads of people interested in these tiny, perfect bite sized treats!

Who doesn't smile when they see a cupcake? They just look so cute!

With summer around the corner, I've been working on some special summer combos for my cake business.
Since my family and I took a trip last summer to do mission work on the islands of Trinidad and Tobago, I've fallen in love with tropical... well... everything!

When I saw this recipe for Guava cake over at Kuki's Kookbook, I knew I had to try it. I mixed it up ever so slightly, and made it into mini cupcakes instead of a sheet cake like in her original recipe, which is here.

Now here's my version:

Guava Cake


Preheat oven to 325.

Cake:
  • 1 package yellow cake mix (Duncan Hines is my favorite)
  • 1 1/3 cup guava juice-(found in my grocery store in the "Mexican food" section)
  • 4 eggs
  • 1/3 cup vegetable oil
  • 1 box instant cheesecake pudding
  • red food coloring- add until you get the color you want
Make the cake together for 2 minutes, then scoop into mini cupcake lined pans. Bake at 325 for 11-12 minutes or until a toothpick comes out clean. While those bake make the filling.


Guava Filling:
  • 2 cups guava juice
  • 1/2 cup sugar
  • 1/4 cup corn starch
  • a few TBSP COLD water
  • red food coloring
  • Pinch of salt
In a medium saucepan, bring guava juice and sugar to a boil. In the meantime, make a paste out of the cornstarch and the small amount of cold water. It's going to resemble cement Keep mixing adding water a drop at a time until it resembles runny elmer's glue. Remove guava juice mixture from heat and whisk in cornstarch paste. return to heat and bring back to a boil. boil for one minute stirring frequently. Cool in the fridge, or if in a hurry, in the freezer. Once cooled, stir in red food coloring until gel is the color you desire. 

Icing:
2 Pkg. Cream Cheese, soft
2/3 C white sugar
3 TBSP.coconut milk (the canned kind! Use the thick, part that is usually on the top after you open it)
1 tsp. Vanilla
2 TBSP, salted butter, soft


Mix all ingredients together until light and fluffy.

Toast 1 C. coconut by spreading sweetened coconut out on a cookie sheet. Bake at 350 and check every 5 minutes to stir until most of it is brown. Make sure to cool it before dipping your baby cupcakes!

By now, you've baked lots of minis. After they are cool, use a Boba tea straw (they're perfect for cutting holes in mini's!) Or anything small that you could punch a hole with. Fill the hole with some of the filling, then smear just a tiny bit on top of each cupcake. Put your icing in a piping bag (or a ziplock with the corner cut out) and ice them.

After they are iced, turn them over and "dip" them into the toasted coconut.

Even my husband, who hates guava, loved these. Enjoy!


Tuesday, April 17, 2012

Broccoli baguette pizza


Hi again! I'm getting a little behind in this whole blogging thing- not that I am surprised. It seems that sometimes I like to pretend that I'm superwoman, whilst forgetting that I am, in fact, not. Ha!
Then I get behind in pretty much everything. Like right now.
We've been home from spring break for over a week and I just now put the last load of laundry in from that- am I pathetic or what?!

This recipe today is one that I've been making for my family for years. It's unbelievable how the flavors meld together to create something unexpected yet delicious. I think I started making it when we went on a vegan kick many years ago. It didn't last long. I discovered I really have a hankering for meat and cheese  :) This isn't really pizza if you only count pizza as toppings on a rolled out crust. But here in our home, I've found that if I call anything pizza, I entice the kids to try it at least!

My family really loves it and the kids have been begging me to make it for them. You should have heard the squeals of excitement flowing from my kitchen after I told one of them. It traveled down the line of kids in a domino affect, and I had 4 giggling, crazy kids helping me before I knew it. Over broccoli. Someone pinch me!

You won't need much time for this recipe. I like to keep most of these things stocked in my pantry anyway.

Broccoli Baguette Pizza


1 baguette split down the middle from top to bottom
2 cloves garlic- crushed
Olive oil
Kalmata Olives- diced (be careful, these have pits! I use a cherry pitter to de-pit them or you can buy them already sliced- which is obviously the better route here.) You find these in jars in the olive section!
1 1/2 small onion- sliced very, very thin.
1 tbsp sugar
1 1/2 tsp dried rosemary (try fresh in the summer- just add more!)
1 1/2 bunches of fresh broccoli crowns. Washed and cut small

Preheat oven to 400 degrees. 


Place baguette on a cookie sheet and brush with olive oil. Sprinkle with crushed garlic- 1 clove for each half. (I use the back of a large spoon to spread it around more evenly)

In non-stick skillet, combine 1 tbsp olive oil, all the onions, and the rosemary.. Cook a few minutes on high, then reduce heat- but still keep it towards the hottest setting. Add sugar to the onions and stir frequently until they start to caramelize. 


Remove them from the heat once they are brown and caramelized. Put in a separate dish as you still need your skillet! 


Add broccoli to your skillet. No need to wash it out, and you shouldn't need any more oil either. Cook on high heat for a few minutes. Put a dash of salt and pepper on them. and then add about 1/4 C water. It will help "steam your stems" :)


Cook for a few minutes more, just until you see your greens getting greener- don't overcook! When they turn bright green remove them from the heat!

Now assemble your goods. 


Sprinkle olives evenly down the bread. You want the pretty thin, but you also want the bread mostly covered.
 Next do the same with your onions. Sprinkle them evenly as well.

 Last, add the broccoli, in the same manner. Don't worry if some falls off. You can put it back on later.
I like to pour a tiny amount of olive oil over the top before cooking.


Bake for 10-12 minutes.


Usually I make this as our main dish. However, I have also made it as an appetizer for company, and it's always a hit. I do recommend slicing the bread into 5 pieces before assembling if you plan to use it as an appetizer. It's just easier to cut before it's put together!


Thursday, April 12, 2012

Chicken,Bacon, Strawberry pizza


No, that wasn't a typo up there in the headline. Today, I'm sharing one of my favorite new recipes. Ii nabbed this one off of Pinterest (of course!) and boy, oh boy I can't get it out of my mind. It's that good.

If you've been to the grocery store lately, you'll notice it's that time again: Strawberry time! I love this season when they are so cheap. My family counts to eat them in their salads, in their desserts, (of course in their cupcakes and cakes), and in their lunches as snacks. I also spend a day or two making freezer jam to carry us through the next year. Never before had they thought I would serve them on a pizza. In fact, I never thought I would (or could) get away with it.

The first time I made it, I didn't tell them, and hoped they wouldn't notice. I thought maybe, just maybe those red pieces on top could pass for red peppers. I considered turning off the lights that night and eating by candlelight. I didn't want them to scrutinize before they had a chance to taste it. In the end, they (of course) saw the berries and were alarmed. We encourage our children to try different food before they determine they don't like something. At least 1 bite. And one bite for them (all of them!) was all it took. The entire pizza was done before I could blink, and they were begging for more. I was delighted!

Before you judge- try it! It's a pretty quick meal to ship up when you use store bought dough. Yes, that's right. I use dough found in the freezer section by the frozen rolls etc. Bread baking/dough making is just not my thing. I seem to always mess up the yeast, not knead it enough etc. So, I skip the part I'm not good at to get to the stuff I really like.

There's something about taking that ball of thawed dough and stretching it out. Tossing it in the air in between rolling, pretending I'm a guy named Luigi and I have a captive audience of people who are in awe at my dough-making ability. Everyone wants to know how I do it.... until I miss and it falls with a plop onto the floor. With that, my day dreaming ends, I grab another ball of thawed dough, and this time, I gently knead and roll it until it fits my baking sheet.

 The original recipe, found here at  The Caf'e Sucr'e Farine 
is amazing. She's a genius.  Go ahead and pop over to look at all her scrumptious pizza recipes!

In an effort to make things a tiny bit simpler, I (as mentioned) use frozen dough. The dough really helps make this, so make sure you are using a great dough! I also made it simpler by cooking my pizza's on a baking stone. I love the way the crust turns out both crispy and chewy. So without further adieu, the pizza you've been wanting to try and just didn't know it!

Chicken, Bacon, Strawberry pizza
(I double this recipe for my family and make 2 large pizza's)
For the sauce:
 ½ cup strawberry jam or preserves, (I used Smucker's Simply Fruit, no sugar added)
1 teaspoon red pepper flakes

 ¼ cup balsamic vinegar

For the Pizza: 
1 cup diced or shredded chicken breast, from rotisserie chicken or left over chicken of any kind
1/2 pkg. bacon,  cooked crispy and drained then crumbled or cut into tiny bits
½ of a med. sweet onion- sliced very thin!
12 ounces shredded Italian blend cheese

 ¼ cup fresh cilantro, finely chopped
 ¼ cup fresh strawberries, diced small


First, preheat oven to 450 degrees.

Make sure your dough is ready (thawed if using frozen dough). Knead, stretch, and roll it out. I usually do it directly onto my baking stone, and only use a little flour on the top so my rolling pin doesn't stick. If you are using another kind of baking sheet make sure to oil it or grease it, and roll dough onto a floured surface.
                           (Notice my dough isn't perfectly round- it still looks gorgeous when cooked!)

In a small saucepan, cook balsamic vinegar until it is about 1/2 the volume. It'll get a little thicker and a tiny bit syrupy. Add in jam, and cook another minute. Remove from heat.

Take 1/8th C. of sauce and add to your cooked chicken. Toss to coat.

 Spread onto dough using the back of a large spoon. Make sure to leave a small edge for the crust!

Evenly spread cheese over the sauce, add the chicken, the onions and then sprinkle the bacon. 
                                             (everything's better with bacon!)

Bake for 8-13 minutes or until bubbly and brown.


Remove from oven, let set for 2 minutes, then add fresh berries, and cilantro.


Enjoy with a side salad of greens and berries and nuts. this one's a real crowd pleaser!


Wednesday, April 11, 2012

Fruit Nachos with Cheesecake Fluff- the perfect summertime dessert!


Hi! Have I got a tale to tell today.

Ok, well it's not really a tale, it's more like a recipe. We just got back from a vacation to the sunny and warm state of Florida and it was delightful. Never have I been more excited to see summer arrive, now that I am home.

Since we just returned, I've been busy with unpacking, doing a mountain of laundry, and getting the house back into order, which is not fun nor exciting at all. However, I had a last minute guest pop over for dinner last night (we love that kind of company- so spontaneous and fun!) but I was a little unprepared for company. I had gone to the store for a few essentials but dinner last night was pretty much a 'look in the pantry to see what you have then throw it in a pot' kind of a meal.

I had about 10 minutes notice that company was coming, so I quickly looked in my fridge, pantry to see what I could add to my meal to make it a little more memorable.

After taking inventory of what we had, I was thrilled to discover that I had everything needed for this delicious dessert I had just had in FL! (Ok, I really didn't have everything. I had my darling husband run to the store for 2 items that were missing. He's such a good guy, and he loved these so much that he was happy to quickly fetch me the needed items.)

It only took a few minutes to make, and is super-duper delicious. Be sure to make plenty as they will go quickly!

Fruit Nachos

For the chips:
1 pkg. flour tortillas
1/4-1/2 C melted salted butter
Cinnamon/sugar ( I make my own with  1 tsp. cinnamon and 1/4 C sugar)


For the fruit:
1 can pineapple (drained) crushed works best but you can chop up any other cuts you have
1 large apple, diced small
1 container strawberries, diced small


For the Fluff:
1 container Cool Whip
1 pkg. "cheesecake" flavored pudding mix
1/2 C. greek yogurt


Heat oven to 400.
Take the tortillas and butter each side. Sprinkle with cinnamon and sugar, then cut into triangles, the way you would slice a pizza. (I use kitchen scissors to do this, but a pizza cutter works well also), then spread out in  a single layer on a cookie sheet.


Bake for 5-7 minutes, take them out, turn each chip with tongs, and pop them back in for 5-7 min. You want them brown and crispy but not burned. The sugar will caramelize a bit and make them look darker- that's a good thing! Now take them out and set them aside. These can be made in advance, and kept at room temp. for a day.


For the fruit, chop everything and mix it together.


For the fluff, add the Cool Whip, pudding and yogurt and mix with a hand or a stand mixer until fluffy and mixed well.


Serve with the chips on the bottom, fruit on those, then the fluff on top. You can also leave each separate and guests can build their own.

Enjoy! And don't forget to let me know when you try them!


Tuesday, March 27, 2012

Nasi Goreng or Indonesian Fried rice


Yesterday I posted a great banana roll up recipes reminiscent of what you may find on a warm tropical island. Today, I decided to stick with the island theme and post this recipe for Nasi Goreng, or Fried Rice Indonesian style.

Now, I love to cook. I would rather spend my days in the kitchen covered in edible soot (flour/sugar or the like), then say, be outside gardening. (Although I do love to garden as well.) However, with 4 kids and a business that I run out of my home, sometimes a girl has to have something quick and easy. That looks gourmet, and like it took a lot of sweat and tears to create. Enter Nasi Goreng.

I first learned of this exotic sounding meal from my husband, who in the 90's, was the first person to cross the island of Papua New Guinea without the use of motors. Allow me to pause here for a shameless plug for the book about their adventure. It was written with the use of my husband's carefully detailed journals, by his travel buddy Joel Kramer. It's a good edge-of-your-seat-yet-quick read! You can get it anywhere, but here's a link to reviews online Beyond Fear, a Harrowing Journey across New Guinea. Trust me when I say it will NOT disappoint you.

Ok,now that you've bought a great book, back to food! So, my handsome and adventurous husband ate this (among other things like pig poop, bugs and bat brains) in order to survive in the jungle. Obviously, of those things listed, the Nasi Goreng sounds like the only one I want to recreate for my family :) He remembers it being the most delicious thing he's eaten in a while.... but of course it was, look at the other things on that jungle menu!

I've tried over the course of many years to recreate the dish to no avail. By his standard, there is always something not quite right. I've tried little bag mixes, box mixes, you name it! He's tried it in Belgium and Holland, only to be disappointed.Until now.

I was googling recipes one day and came across this baby on Food.com.
I've tweaked it below, but let me tell you the results were fantastic. And fast. And delicious. I made it veggie since we were out of meat, (I really need to get to the store) but no one missed it. It was THAT good.

I served it with a bag of frozen pot stickers that I steamed. Remember that I cook for a hungry crowd. If your crowd is smaller, just cut this in half. Unless you want to freeze leftovers for another time.

Nasi Goreng

4 C cooked rice (I actually used sushi rice, but you can use basmani as well)
  • 1 onion chopped small 
  • 3 stalks sliced celery 
  • 2 peeled, diced carrots/ few pieces broccoli
  • 1/2 C shredded cabbage 
  • (You can also replace veggies with a bag of frozen ones!)
  • 2 cloves garlic , crushed
  •  2 chicken stock cube
  • 1/2-1 tsp. crushed red pepper
  • 4 Tbsp. Ketsup Manaese (or ABC Sweet Soy sauce found at Asian stores)
  •  1 tablespoon coriander seed
  • 5 Tbsp. butter or olive oil
  • 2 eggs for the omelet to decorate the top

    Heat the oil in a skillet or Wok. Add onions, celery, and carrots other veggies. Salt and pepper these, or use plain soy sauce.
     
    Add garlic, the bullion cubes, coriander, and red pepper. Cook 2 min. more until translucent. 
    Add the Sweet Soy sauce (It's thick and red, like ketchup!) Cook for another 2-3 minutes.
     
     Now add the rice, turning carefully to coat and mix thoroughly.

    Use a metal bowl and PACK the rice into it. Allow it to rest for a few minutes while you cook your omelet in the pan Scramble 2 eggs and cook so that they are still 1 large disk (like an omelet).

    Once done, turn the metal bowl of rice over onto serving platter and tap gently (or pound!) until it releases. Slip the omelet onto the top, and serve (and pretend you are on that exotic tropical island of Indonesia or Papua New Guinea) Oh! Almost forgot! It never hurts to add a little green sprig when serving. We added the pot stickers around the sides and top along with some fresh celery.Yum!

    Monday, March 26, 2012

    Easy Peasy Banana Breakfast roll-ups!


    Happy Monday!

    The sun is shining, the weather is getting warmer, and I can see daffodils and hyacinths blooming in my yard... it's going to be a good day!

    I know most people hate Mondays, and you may want to stone me for saying this, but I LOVE them! Monday is the day I get to recoup from long busy (and loud!) weekends. I love having my family home, but lets face it, they destroy all my hard work in 2 single days at home.

    Mondays are the day I get to re-take my territory. The kids are back to school, and the hubby is back to laboring hard to provide for us. Monday is the day I get to blast my music as loud as I want, throw on my wrinkled clothes with tiny bleach stains all over them, throw my hair into a quick pony, and reclaim the land once known as "Clean as a Whistle!".

    Lest you think my Mondays are prefect let me share they are not. It's also the day the kids don't want to get up on time, we remember that we didn't get that project or paper done- that we had all weekend to finish- and the day I have to peel my eyes open at the crack of dawn after getting two whole days to sleep in (until 7). It's the day I wake up and realize I forgot to get to the store, so we are out of all things important. You know, eggs, milk, cereal, oatmeal, bread. Wait!! What are we going to eat??!

    This recipe is easy and healthy and can help make any Monday madness turn into Monday gladness. It takes only  a few ingredients so when the pantry is empty, this is a good go to.

    I usually keep a bag of frozen over ripe bananas in my freezer. I pull out a few, zap them in the microwave for a couple of minutes, and viola'! (I've also used just ripe bananas and they were still good.)Ready for a unique and healthy meal that hopefully your kids will love as much as mine do. (Note: I have a banana hater in my family and she still gobbles these things up!)

    -Now, when you make these for the first time, you may want to NOT make them when you are in a  rush. They can be tricky to get the hang of the first time since the dough is very, very sticky. You'll want to make sure you have about 30 minutes to spend making them the first time.

    -You'll also want to make sure that you have a nonstick skillet. These will stick, they are sticky!! Don't say you weren't warned about stickiness.

    The Original recipe can be found here at Love Food Eat.

    Banana Breakfast Roll ups

    2 C. Whole wheat flour (If your family isn't used to whole wheat you can use 1 C white and 1 C wheat or all white)
    1 C. Mashed bananas
    1 Tbsp. sugar (I use raw in this particular recipe)
    2 Tbsp. Canola oil 
    Extra flour to roll
    Extra oil for cooking

    Honey and Butter for serving.

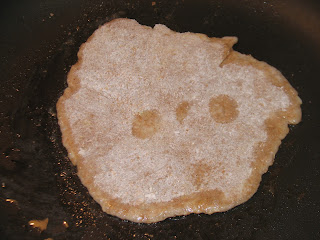
    Measure flour into large bowl. Add bananas. (In this photo I added whole, just ripe bananas directly to the flour and mashed them into the flour using a potato masher!) But the proper way is to mash them first.
    Add oil and mix well with a spoon or spatula. It's going to be sticky remember?!

    Section dough in the bowl the same way you would hamburger meat. (using the side of your hand "cut" the dough the way you would a pizza. so all pieces are even.)

    Pour 1/2 C or so of flour onto the counter top, and roll out on section of dough into a circle. You want it thin.  about 1/4" thin or so. Make sure to gently sprinkle flour on each piece as you roll so your rolling pin doesn't stick!


                    (This my friends, is my super duper PVC pipe rolling pin- cheap and they work so well!)

    Make sure you have a few rolled out and your pan is pretty  hot. Add a little oil to pan and then cook each flat bread until just brown on each side.


    Once they are done, put a little butter and honey inside, roll up and enjoy the squeals from your happy children! (sorry I forgot to take a photo before my kids snarfed down all the rolled ones.)


    Thursday, March 22, 2012

    Mmm- Do you smell that Irish Soda bread?!


    So, we all know that St. Patty's Day is over, but have no fear..... this is one recipe you'll be wanting to make ALL year round.

    Let me start by sharing what holiday's are at our house. They are a big deal, not a "paint our faces and our lawns" kind of a big deal, but more like a " all food and fun on this day MUST remind us that today is not just a normal day.... it's a holiday!" kind of a big deal.

    I've trained my kids well, and they expect their food on any given holiday to scream "It's a holiday!" Personally, I like St Patty's Day as it's a great way to squeeze in more green veggies. If they moan or gripe as I bring out the plate of crisp green bell pepper, all sliced up to resemble shamrocks, I get to respond something like, "It's a holiday isn't it??!" They usually sigh and then happily much away on whatever green goodness i have just placed before them.

    I tend to make the usual fare every year, but this year via Pinterest I decided to shake things up around here a bit. I've tried Soda bread out of a bag and a box, but never made this kind of bread from scratch.Since Spring Break is close, (and I've watched enough award shows to know that all the big stars go carb-free to look their best) so I've been sticking to a limited carb diet in hopes of shedding a few last minute pesky pounds before I have to debut my Michigan white as snow skin. But after I saw this recipe on Cakespy and it looked SO easy and delicious I had to try it. It turned out scrumptious. So good in fact, that my family had gobbled up the entire loaf in less than 30 minutes, slice after slice, I watched that loaf sit on the stove and get smaller and smaller.

    This recipe is a keeper! I baked it on a baking stone, and didn't knead it at all! Seriously. My family is already begging for me to make it again. Crisp, slight sweet and chewy on the inside. Bonus! It's smells great while baking!

    Here's the recipe:

    Irish Soda Bread to make again an again
    • 4 to 4 1/2 cups flour
    • 2 Tbsp sugar
    • 1 teaspoon salt
    • 1 teaspoon baking soda
    • 4 Tbsp butter, cubed
    • 1 cup raisins
    • 1 large egg, lightly beaten
    • 1 3/4 cups buttermilk
    Procedure
    1. Preheat the oven to 425 degrees. Whisk together the 4 cups of flour, sugar, salt, and baking soda in a large mixing bowl. Using clean fingers or a pastry cutter, work the butter into the flour, mixing until it resembles a coarse meal, then stir in the raisins.
    2. Make a well in the center of the flour mixture. Pour the beaten egg and buttermilk into the well, and combine with a wooden spoon until the dough is too stiff to stir. Dust your hands with flour, then gently pour dough onto baking stone.  Take a little more flour and use it to pat the dough into a ball. Your bread could become tough if you over-work it. The dough will be a little sticky, like biscuit dough.
    3. .Using a serrated knife, score top of dough about an inch and a half deep in an "X" shape. 
    4. Bake until the bread is golden and the bottom sounds hollow when tapped, about 35-45 minutes. Check for doneness by inserting a long, wooden skewer into the center of the loaf. If it comes out clean, it's done. If the crust gets too dark while baking, tent the bread with aluminum foil. Serve warm.

    Tuesday, March 20, 2012

    Baked Oatmeal


    Yum, yum, yum. That's what your family and guests will be saying when you serve them this uber good morning treat!

    I've been making this recipe for years. It's my go-to when we have company. It's my go-to when my kids are tired of eating cold cereal every single day. It's quick. It's easy. And it's oh, so delicious!

    I've never made it for a guest who didn't ask for the recipe, and there are so many ways it can be made it's easy to change it up for a different taste every time. It's also great when made the night before (not cooked) and refrigerated until morning. Just let it sit out for about 10 minutes before popping it into the warmed up oven.

    I think I've had this for about 10 years, and I believe it has roots in the Amish. It's sort of like a healthy, custard-y oatmeal cake, and depending on your family size, it can feed you for a few days. Confession: I'm starting to feel sad every time I make this breakfast. As I stated a minute ago, I've been making this for years, and it used to last for days. It's easy to re-heat, but my kids even like it cold! But how can oatmeal, (esp. and oatmeal like cake thing) make you sad you may be asking? These days, one batch is gone in s single few minutes out of the oven. It's another sign that my kids are growing older, getting more independent, and needing this mama a little less. And that my friends, makes me so sad. What will I do when none is home to bake this for?!

    SNAP! Ok, I'm back to reality. Although gone are the days of single recipe cooking, here and now, I have to make a double recipe if I want leftovers, and I'll enjoy that while I still can!

    Behold my friends, the Baked Oatmeal.

    BAKED OATMEAL

    1/2 C canola oil
    1/2 C applesauce
    1 C sugar (or less. I adjust. If using berries I use about 1 cup. If using apples I use 1/2 C.)
    4 eggs
    4 C oatmeal
    4 tsp. baking powder
    2 C milk
    1 tsp. cinnamon
    dash nutmeg

    Any kind of fruit you'd like. My family's favorite is apple. I dice unpeeled apples (2) and add it in. 
    I also like to use a bag of frozen berries. (yup! Just toss in the whole bag of frozen berries!) Whatever suits your fancy. Here are some suggestions to get your mind rolling:

    Apples/cinnamon (when doing this I also sprinkle the entire top of it with a generous amount of cinnamon so that the whole top looks brown)
    Bananas/walnuts
    Apples/raisins
    Berries/almonds
    Peaches/pecans

    Heat oven to 375 F.
    Measure out your oatmeal into a large bowl. Add the baking powder,sugar and spices.
    Mix the dry stuff, then add the eggs, the oil and applesauce and lastly the milk. Then add your mix-in's of fruit and nuts. Mix well with a spoon or spatula.
    Pour into a well greased 9X13 baking dish. Smooth out. At this point, wither bake it or cover it and put it in the fridge for morning.

    Bake for 40-50 minutes until edges are brown and middle comes out clean.

    Cut into squares and serve with a pat of butter and a small amount of milk. Enjoy! And get ready to share the recipe as everyone you know will want it!


    Sunday, February 26, 2012

    Grapefruit Rosemary Meringue Cupcakes


    Oh joy! 

    It's cold and grey up here in my neck of the woods, but one food leads me to think of sunshine, hot weather and the ocean. It could be an orange, or even a lemon. Only it's not.

    It's a big ruby red grapefruit! I brought home a huge, juicy, delicious bag from FL last spring and ever since, I've dreamed of that fun in the sun every time I open one. Usually, my grapefruit is limited to a breakfast or snack food, with the occasional appearance in a salad, but thanks to Pinterest, I got to thinking...why couldn't it become a major player in fluffy, sweet and delicious cupcake?!

    I began my mission looking at recipes, flavors that meld well with this fruit, and even looked to mixed drinks for inspiration. I know what you're thinking : rosemary?! That little green sharp leaf that is only used in savory foods? To be honest, I was skeptical myself, but rosemary is a fresh tasting herb which lends very, very nicely with this big citrus fruit.

    I've seen recipes with cream cheese icing (and you can never go wrong with that), and with Meringue buttercream (which is smooth and not to sweet) but I wanted something different. I decided that a plain meringue would work well. Hey, It works for Mr. Grapefruit's cousin, the lemon pie!

    I think I came up with a good, fairly easy recipe that will astound your guests. The hint of rosemary is so light, you can't quite put your finger on what the flavor is, yet it is just perfect for a hint of refreshing flavor.

    First, you'll need your cupcake base. I was completely out of white flour so I dr'd a mix. A Duncan Hines white mix to be exact.
    If your a purest and horrified at the thought of starting with a mix, you can try out a scratch version of the cupcake recipe here at Landee See, Landee Do. She's the chick that inspired me to try mixing these flavors in the first place!

    Now, back to my cupcake base:

    Grapefruit Cupcakes
     Makes 24
    1 box Duncan Hines white cake mix
    3 egg whites and 1 whole egg
    1 C (canned) coconut milk- shake it before opening
    2 Tbsp. oil
    1 box instant pudding white chocolate
    1/3 C freshly squeezed grapefruit juice (taste it first to make sure it's good!)
    zest from 2 grapefruits
    1/2 tsp. dried rosemary (roll it between your fingers as you add it to break it up again)
    You can also use 1 tsp. fresh rosemary- chopped fine

    Add everything together and mix for 2 minutes. I added a tiny bit of pink food coloring as the grapefruit didn't give the pink color I wanted. Now bake them up at 325 F, for 18 minutes. Allow them to cool.


     The Curd recipe can also be found at the above link for Landee See, Landee Do.
    Grapefruit Curd

    6 T fresh grapefruit juice
    ½ c sugar
    4 lg egg yolks
    Pinch salt
    4 T unsalted butter, cut into 4 pieces
    2 tsp grapefruit zest

    In a heavy saucepan, whisk together the grapefruit juice, sugar, egg yolks, and salt.  Cook the mixture over med high heat, whisking constantly and scraping the sides of the pan until the curd is thick enough to coat the back of a spoon, 5-8 minutes.  Do not let the curd boil or it will turn lumpy.  Remove from heat, whisk in the butter one piece at a time until smooth.   Stir in the zest and cover with plastic wrap – directly on the surface of the curd.  Refrigerate until set at least 1 hour, up to three days.  Makes 1 cup.  (I had to make 2 batches to adequately fill one batch of cupcakes.)


    After the cupcakes are cool, poke a hole in the center and fill with cold curd. And sure, they make fancy cupcake holer tools, but I've found that the giant straws for "Bubble Tea" (found usually at Asian markets) work great for this job! You just need to poke 'em twice.


    Now, only 2 steps left! The candied grapefruit rind is easy to make for the garnish. Just use a peeler to get strips of peel (leave pith attached), cover with water, boil for 10 seconds. Drain water. Repeat.... 3 more times! 
    Confession: I didn't do this. I only did it one time thinking "What's the big deal?" And boy was I sorry! My peels turned out bitter and gross.. Even covered in sugar. So take the extra few minutes to boil, drain boil. The process really does get rid of the bitter peel flavor.
     

    Next, put 1/2 C sugar and 1/2 C. Water into the same small pan you just drained, like a million times. Add your peel, and boil for about 10 minutes. Remove the peels and sprinkle with white sugar- then let dry. Voila!

                                                           ( I used 1/2 grapefruit for my peels)

    Now, that was easier than you thought.. right?!

    Last, for the Meringue. Simply crack 3 egg whites into your bowl. Add 1/2 cup white sugar. Turn to high and watch it until it form stiff peaks. I piped mine using a big round tip, but you can get it on your 'lil cakes any way you please.

                                                            Nice and stiff and slightly sweet

    Set your oven to broil, and move your rack to the middle of the oven. Carefully set cupcakes into your muffin or cupcake pan. Once the oven is heated up- set them on the top rack and leave the oven door open. Don't move a muscle. Not even to get a drink, and esp. don't answer that urgent phone call you've been waiting for. It takes only between 5-10 seconds to brown the delicate meringue.... and trust me, you don't want to burn it like (ahem) I did. (If you do, it's easy to scrape off , pipe a new peak and try again! This time paying close attention!!)

    Now add your cute candied grapefruit and take a bow. A big one!Allow them to cool completely back down before you try one (warm grapefruit isn't that good you know.)

    Be as impressed with yourself as I am that you tried a recipe with so many steps involved! And don't forget to share them with your friends. I promise they'll be eaten up, crumbs and all.